How Marauders Contracts Work
Join us on DISCORD MAURADERS PORTUGAL
There are two kinds of Marauders Contracts: Core Contracts and Daily Contracts. Core Contracts are a long length of quests for the Pirate Faction. Daily Contracts are random Contracts supporting either the United Allies, Kingdom Alliance, or Central Empire.
Contracts will have different goals such as collecting items, destroying specific objects, visiting certain areas in a Raid Location, or even killing other players. Once completed, you can collect the reward for a Contract on the Contracts page.
Marauders Core Contracts List
These Marauders Contracts are for the “Pirate” faction and essentially represent a long, sequential quest chain that will get you some early-game gear at first. Later on, these Core Contracts will unlock some of the most powerful Weapons and Ships in the game.
Basic Resupply
- Faction – Pirates
- Requirements – Deliver 3 Junk Scrap
- XP Reward – N/A
- Faction Standing Reward – 10
- $ Reward – $2,100
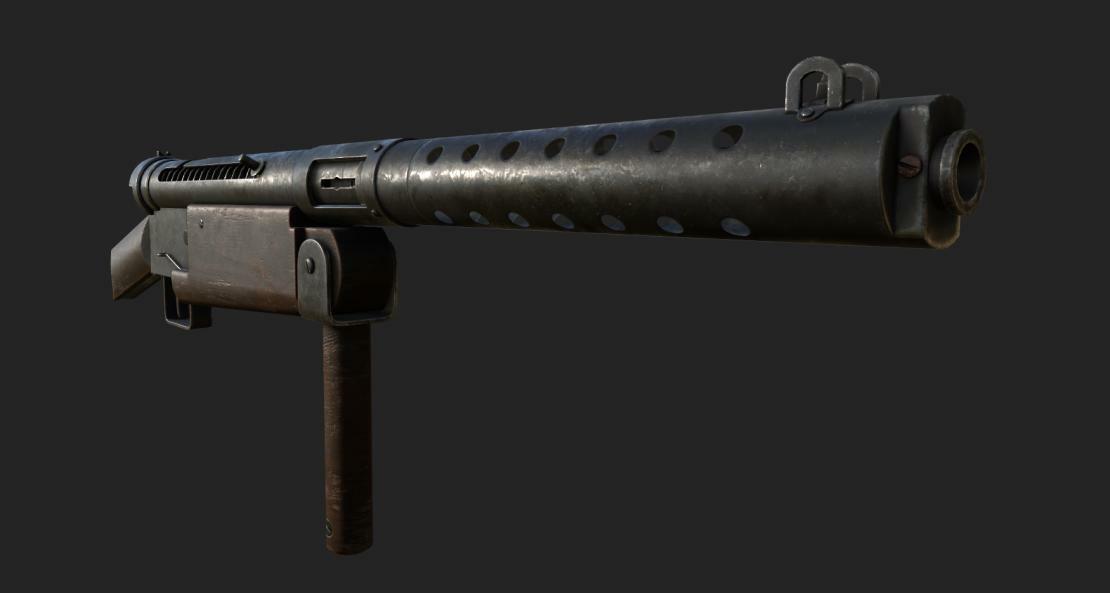
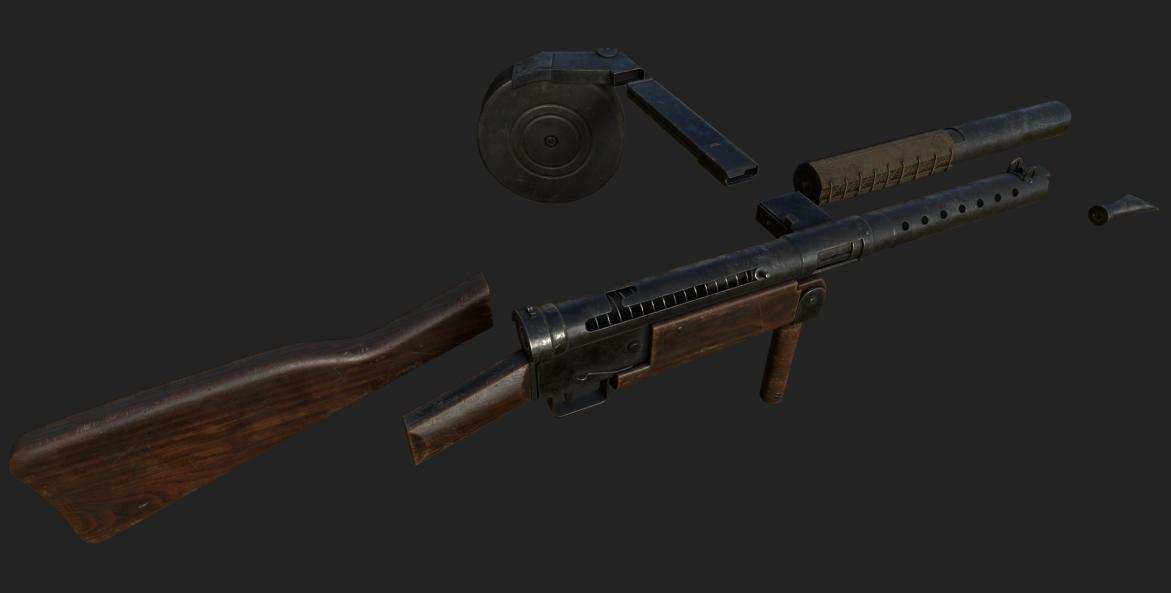
- Other Rewards – 1 MP40, 10mm Ammo
Simply Scrap items that will give you Junk Scrap and deliver 3 on the Contracts screen. The easiest solution is to go into a Raid, grab the default items from your Rustbucket, immediately return home, and Scrap them.

Repo Man
- Faction – Pirates
- Requirements – Examine the Half Track Bike at the Iridium Asteroid Mine
- XP Reward – 150
- Faction Standing Reward – 35
- $ Reward – $2,350
- Other Rewards – 1 Commando Backpack
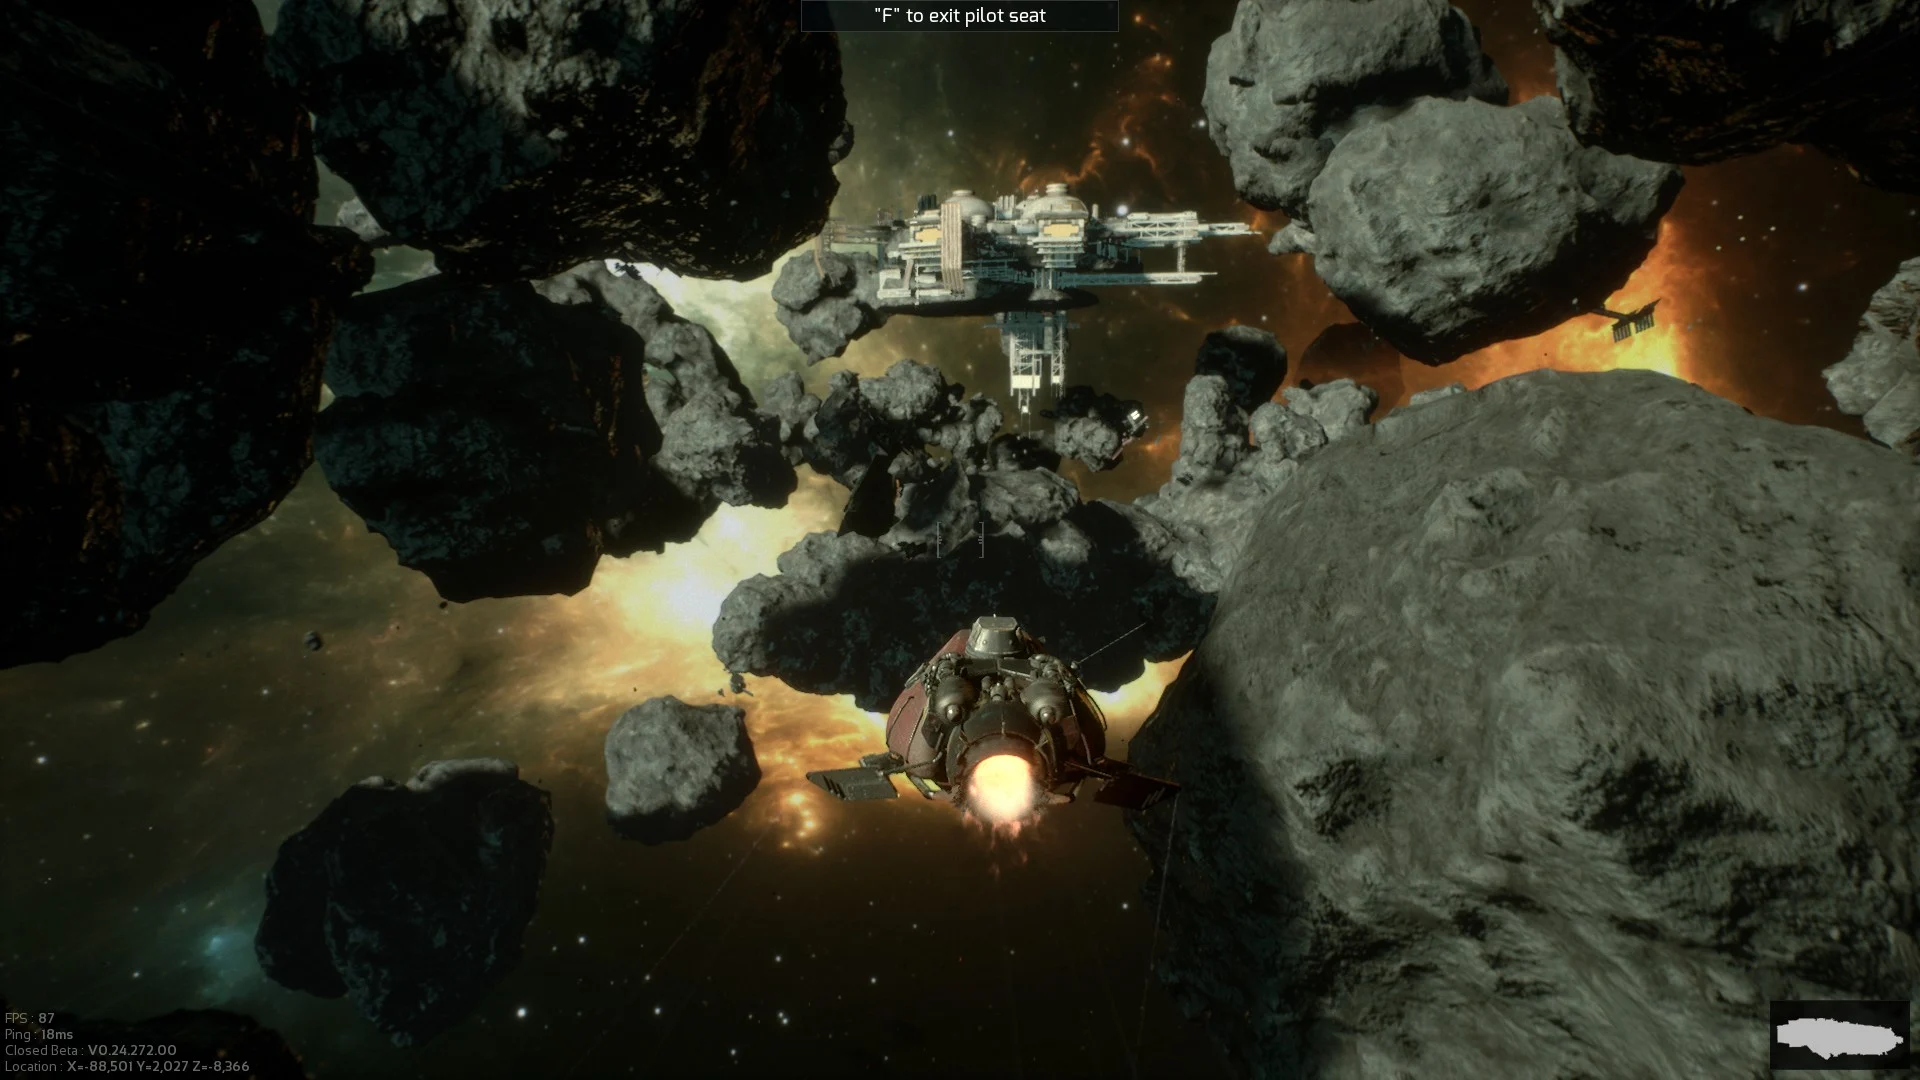
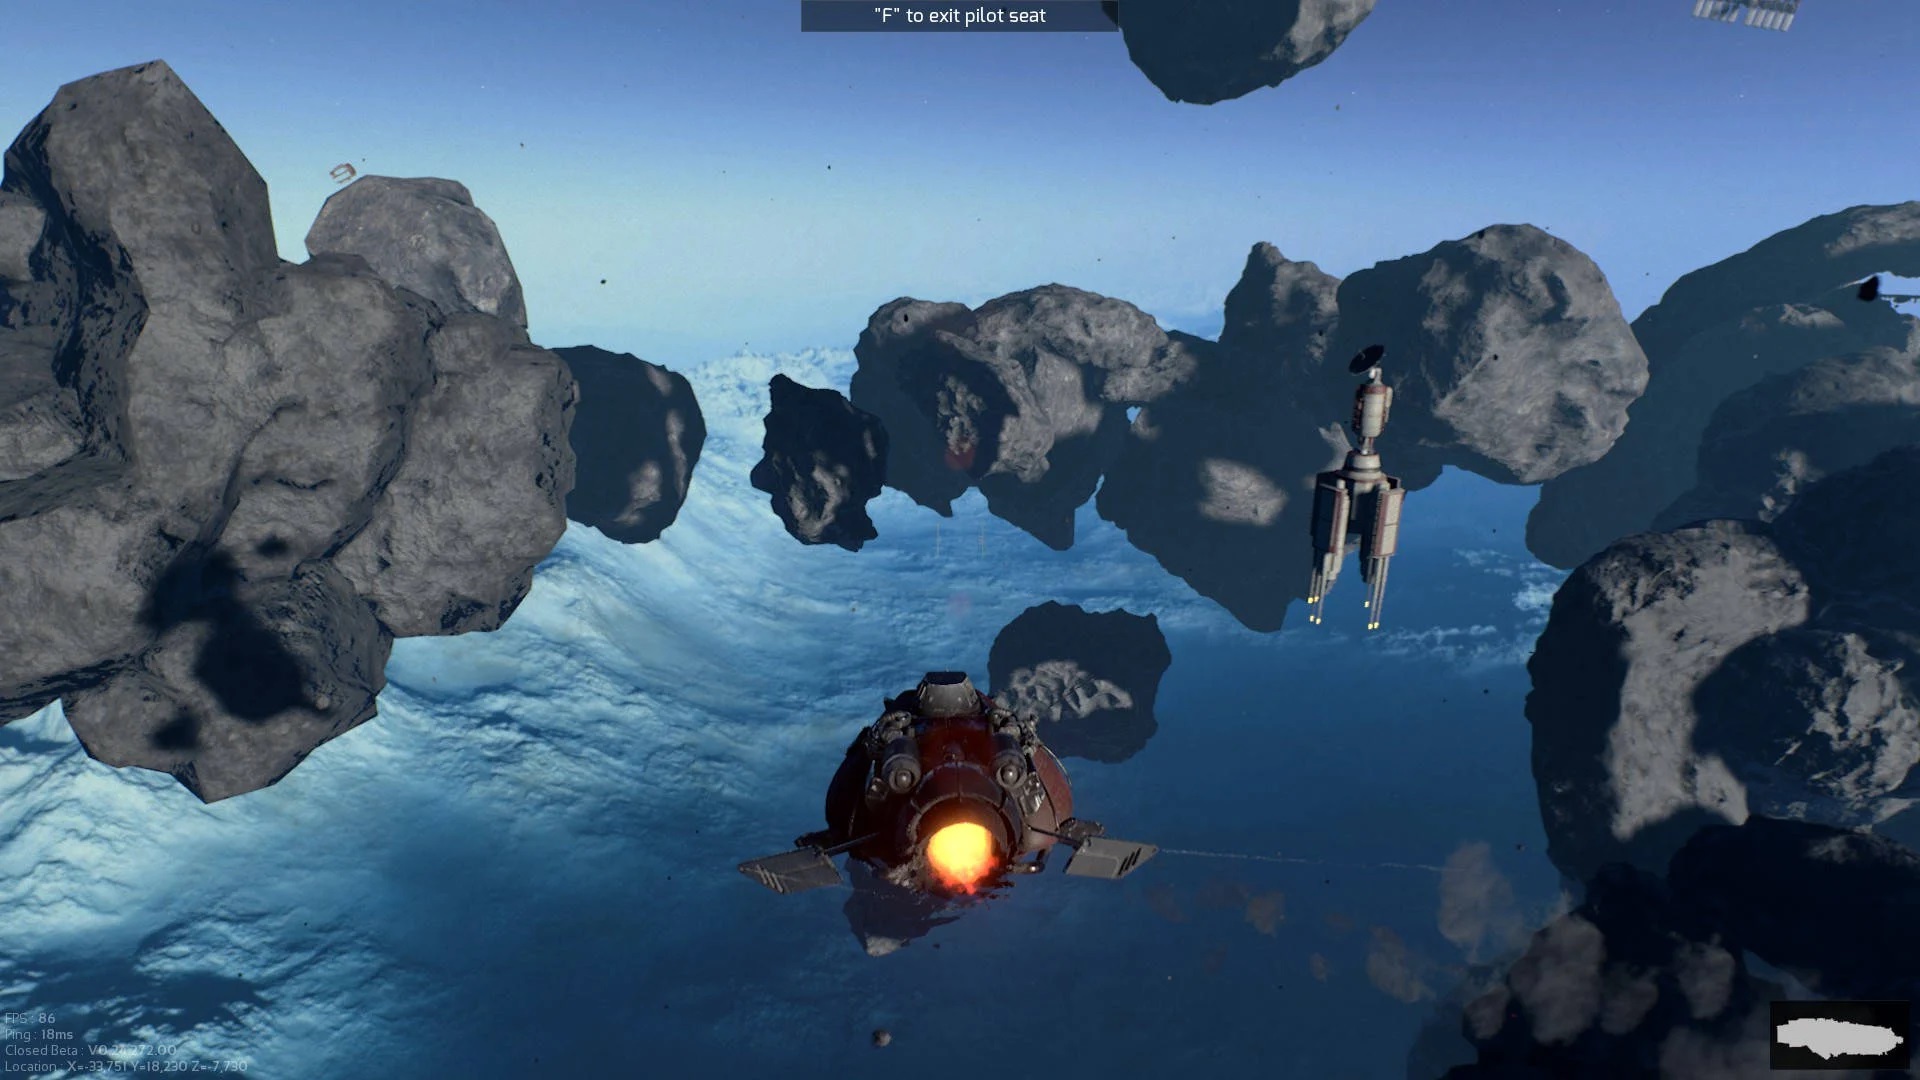
This Marauders Contract will require exploring the Iridium Asteroid Mine and finding the Half Track Bike in question.
The Repo Man Contract is a little misleading; you may jump to the conclusion that you need to examine three separate Half Track Bikes. Thankfully, to complete the Repo Man Contract, simply find a single Asteroid Half Track Bike in the Iridium Asteroid Mine and interact with it when the prompt appears on screen for three seconds to complete the Contract.
The Half Track Bike is located in the Export area of the Iridium Asteroid Mine, near the Security Office. Hidden down a narrow hallway, the Half Track Bike can be found at the following coordinates:
- X = 62, 283
- Y = -4,086
- Z = 74
The area surrounding the Half Track Bike will be populated with various machinery, containers, and even grey half track jeeps. Keep your eyes peeled for these to help you find the objective, while also remaining vigilant of nearby foes. Once you’ve found the Half Track Bike, walk up to it and hold the interact key for three seconds to complete the Repo Man Contract objective.
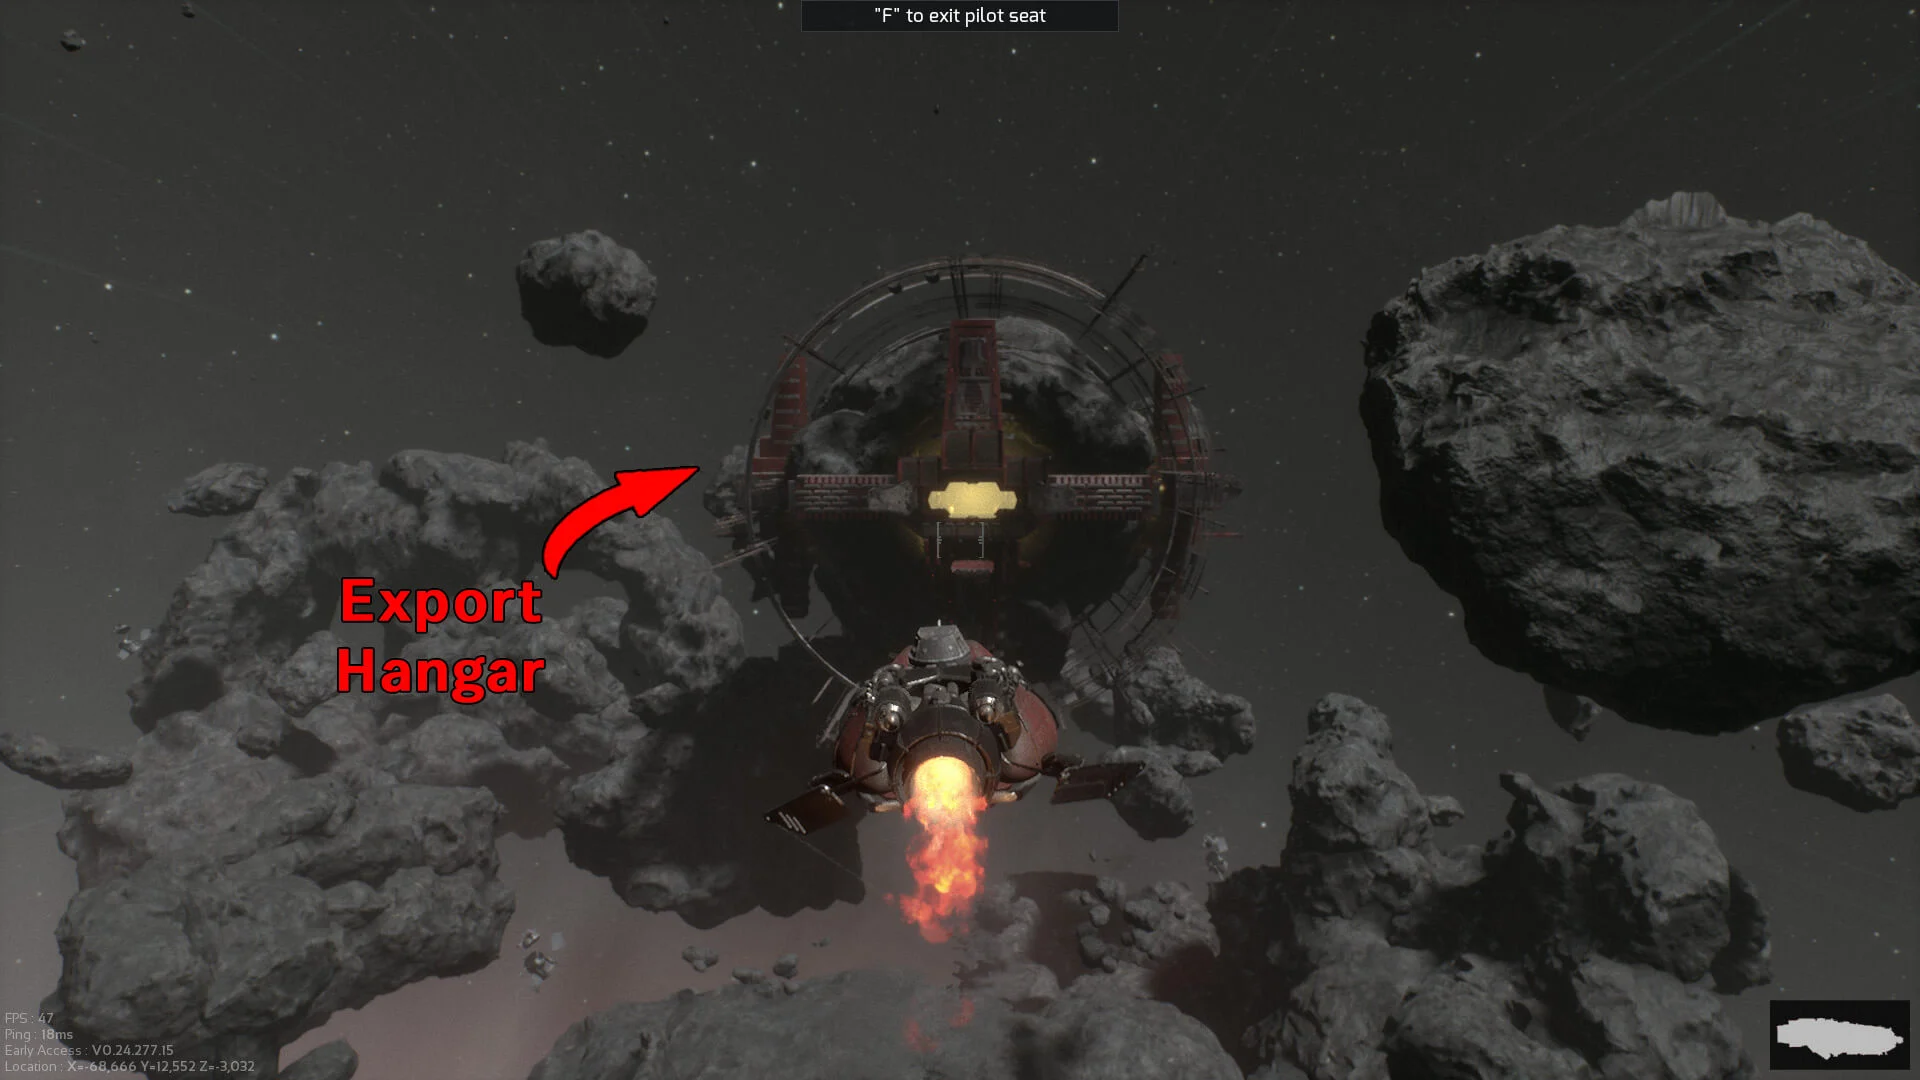
The best way to complete the Repo Man Contract is to enter the Iridium Asteroid Mine via the Export/Security area. Taking the ‘front’ of the Mine as the side with a protruding metal structure around it, enter the ‘left’ hangar from space and head forward to find the location given above. Entering via this area will start you closest to the Half Track Bike location.
Make Your Mark…
- Faction – Pirates
- Requirements – Get 5 Kills with Any Weapon
- XP Reward – 90
- Faction Standing Reward – 50
- $ Reward – $2,800
- Other Rewards – 1 Mat-49, 2x .32 ACP Ammo
To complete Make Your Mark… all you need to do is get five kills, whether that be other Marauders or NPC enemies.
It’s worth noting that progress for this Contract does not seem to be tracking accurately, meaning you may end up needing more than five kills to complete this objective.
Stand Out
- Faction – Pirates
- Requirements – Kill 3 Marauders
- XP Reward – 100
- Faction Standing Reward – 75
- $ Reward – $3,000
- Other Rewards – 2x Ammo Box
To complete Stand Out all you need to do is kill three Marauders (these are other players, not the NPCs).
Finding other players, let alone killing them, is not always an easy task. The best way to complete Stand Out is to head into a Raid with a strong kit, including a primary weapon, armour, and medical supplies, and to stalk the Airlocks for other players just entering the location. Conversely, if you hear a nearby firefight then check it out as other players will be roaming the area.
Use all the knowledge you’ve learned from our Marauders Guide Hub and put it to good use to complete Stand Out.
Advanced Resupply
- Faction – Pirates
- Requirements – Deliver 8 Metal Sheets
- XP Reward – 110
- Faction Standing Reward – 90
- $ Reward – $3,500
- Other Rewards – 1 Small Shield, Unlocks Small Shield Crafting Recipe
To complete the Advanced Resupply Contract, all you must do is collect and deliver eight Metal Sheets. Importantly, all eight Metal Sheets must be in your inventory upon turning in the Contract, though they do not all need to be collected in a single run.
The best way to complete Advanced Resupply is to enter a Raid and loot various containers until you get lucky and find a Metal Sheet or two. Dying in a Raid will cause you to lose your items, including any Metal Sheets you have on your person. Make sure to leave the Raid alive so that you can store however many Metal Sheets you found in your Stash until you have acquired all eight Metal Sheets.
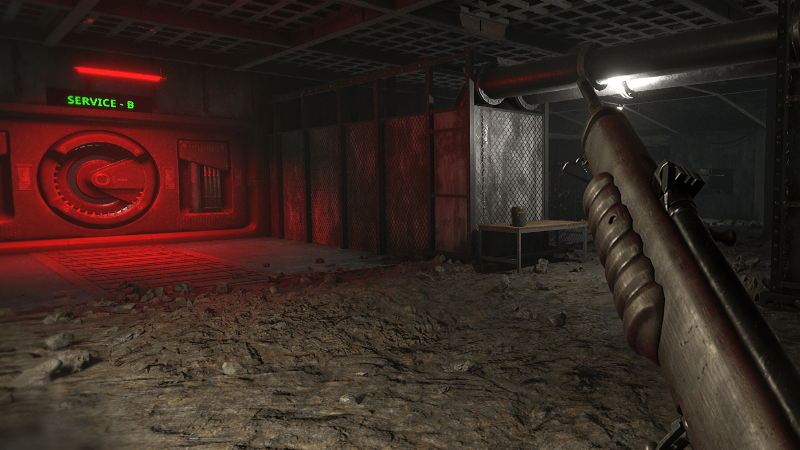
Pirate Rank
- Faction – Pirates
- Requirements – Examine the Merchant Frigate Engine for 25 seconds
- XP Reward – 140
- Faction Standing Reward – 100
- $ Reward – $3,250
- Other Rewards – Unlocks Cosmetic: Outlaw Chest
The Pirate Rank Contract is a return to the more complex and involved objectives like the earlier Repo Man Contract.
Pirate Rank tasks you with examining the Merchant Frigate Engine for 25 seconds. This can be a surprisingly challenging objective as the Merchant Frigate is home to many, many guards, and is a popular location for other players given the high chances of stronger loot.

To complete Pirate Rank, you first need to board the Merchant Frigate. The Merchant Frigate is a random location that can spawn in space during Raids, identifiable by its unique design and bright red lights. To board the Merchant Frigate, use the Escape/Breaching Pods on the lower deck of your ship and fly towards the Merchant Frigate.
If you’re lucky, you’ll spawn in the Engine Room of the Frigate and the objective will be directly ahead. Otherwise, you need to locate the Engine Room. For reference, if you don’t spawn in the Engine Room, then it will be on the opposite end of the ship to your location. Listen out for the loud humming of the engine.

Once you’re in the Engine Room, walk up to the large red engine and interact with it when the prompt appears to examine the Merchant Frigate Engine. You’ll need to hold the interact key (F) for 25 seconds so be cautious of other players out for blood. After you’ve interacted with the engine, you’ll hear a ding and the Pirate Rank Contract will be complete, whether you escape alive or not. Although, there are handy escape pods in the Engine Room to leave the Raid.
Guild Membership
- Faction – Pirates
- Requirements – Deliver a Silver Coin
- XP Reward – 120
- Faction Standing Reward – 115
- $ Reward – $4,200
- Other Rewards – 1 Plate Rig, 1 M1 Helmet
Guild Membership is another relatively straightforward Contract, tasking you with finding a Silver Coin. However, while you are not tasked with finding a specific (often dangerous) area, there is a large amount of luck involved.
Silver Coins are rare and valuable items in Marauders that can be sold for money. Chances are, you’ve found one already but sold it without realising a later Contract would require one. Don’t fret, I’m in the same boat.
Silver Coins can be found almost anywhere in containers and on corpses. Search as many boxes, chests, and bodies as you can and hopefully, you’ll find one sooner rather than later. Areas behind locked doors or inside Marauders‘ many Vaults seem to have a higher chance of dropping these valuable Silver Coins. You will, however, require a lockpick or blowtorch respectively to enter these areas. Happy hunting!
Scouting Party
- Faction – Pirates
- Requirements – Hold the Furnace for 90 seconds (found in the Iridium Asteroid Mine)
- XP Reward – 120
- Faction Standing Reward – 110
- $ Reward – $5,000
- Other Rewards – Unlocks Cosmetic: Outlaw Head
Scouting Party tasks you with standing in the Furnace Room of the Iridium Asteroid Mine for an anxiety-inducing 90 seconds. There are many points of entry to this location so stay on your guard at all times; you never know when or where someone might appear.
The Furnace can be found at these rough coordinates:
- X = 64,000
- Y = -2,000
- Z = -29
More Core Contracts to be added as we progress in the game.

Marauders Daily Contracts List
A total of 6 Daily Contracts are made available each day, and you can have 3 of these Marauders Contracts active at any one time. You cannot cancel a Contract once you’ve accepted it. Any remaining Contracts will disappear at the reset time and you’ll have to select new Contracts.
Air Production
- Faction – United Allies
- Requirements – Activate the Air Processor at the Iridium Asteroid Mine
- XP Reward – 250
- Faction Standing Reward – 50
- $ Reward – $9,000
- Other Rewards – .45 ACP
Once you get to the Iridium Asteroid Mine, head inside and search for the Air Processor area. To find the Air Processor, locate the door marked ‘Air’ near the centre of the map, not far from the Furnace Room. Once you enter the Air Room, follow the short catwalk forward to find the Air Processor door. Enter the Air Processor to find a red switch located on a terminal nearby, above it will be the label ‘Air’. Interact with this switch to activate the Air Processor and complete the Air Production Daily Contract.
The switch to activate the Air Processor in the Iridium Asteroid Mine can be found at the following coordinates:
- X = 66,000
- Y = -1,050
- Z = 499
Bag Maker
- Faction – Central Empire
- Requirements – Deliver 3 folded Light Bags
- XP Reward – 375
- Faction Standing Reward – 20
- $ Reward – $12,500
- Other Rewards – Radio Backpack
As far as Marauders Contracts go, this one is pretty easy — you can Craft the requested Light Bags once you unlock it at Level 5. It will require a total of 6 Synthetic Scrap to make them all.
Boom Relay
- Faction – Kingdom Alliance
- Requirements – Destroy a Radar Tower
- XP Reward – 225 XP
- Faction Standing Reward – 35
- $ Reward – $8,000
- Other Rewards – N/A
You can find Radar Towers in space outside of most Raid Locations — here’s what they look like:
Radar Towers are completely defenseless. They make a distinct sound, so keep your ears open and track it down. A few shots from the Rustbucket’s gun will turn them into scrap in no time.
Brigand Service
- Faction – United Allies
- Requirements – Collect the Gold Ring from the Foreman at the Iridium Asteroid Mine
- XP Reward – 225
- Faction Standing Reward – 20
- $ Reward – $11,000
- Other Rewards – N/A
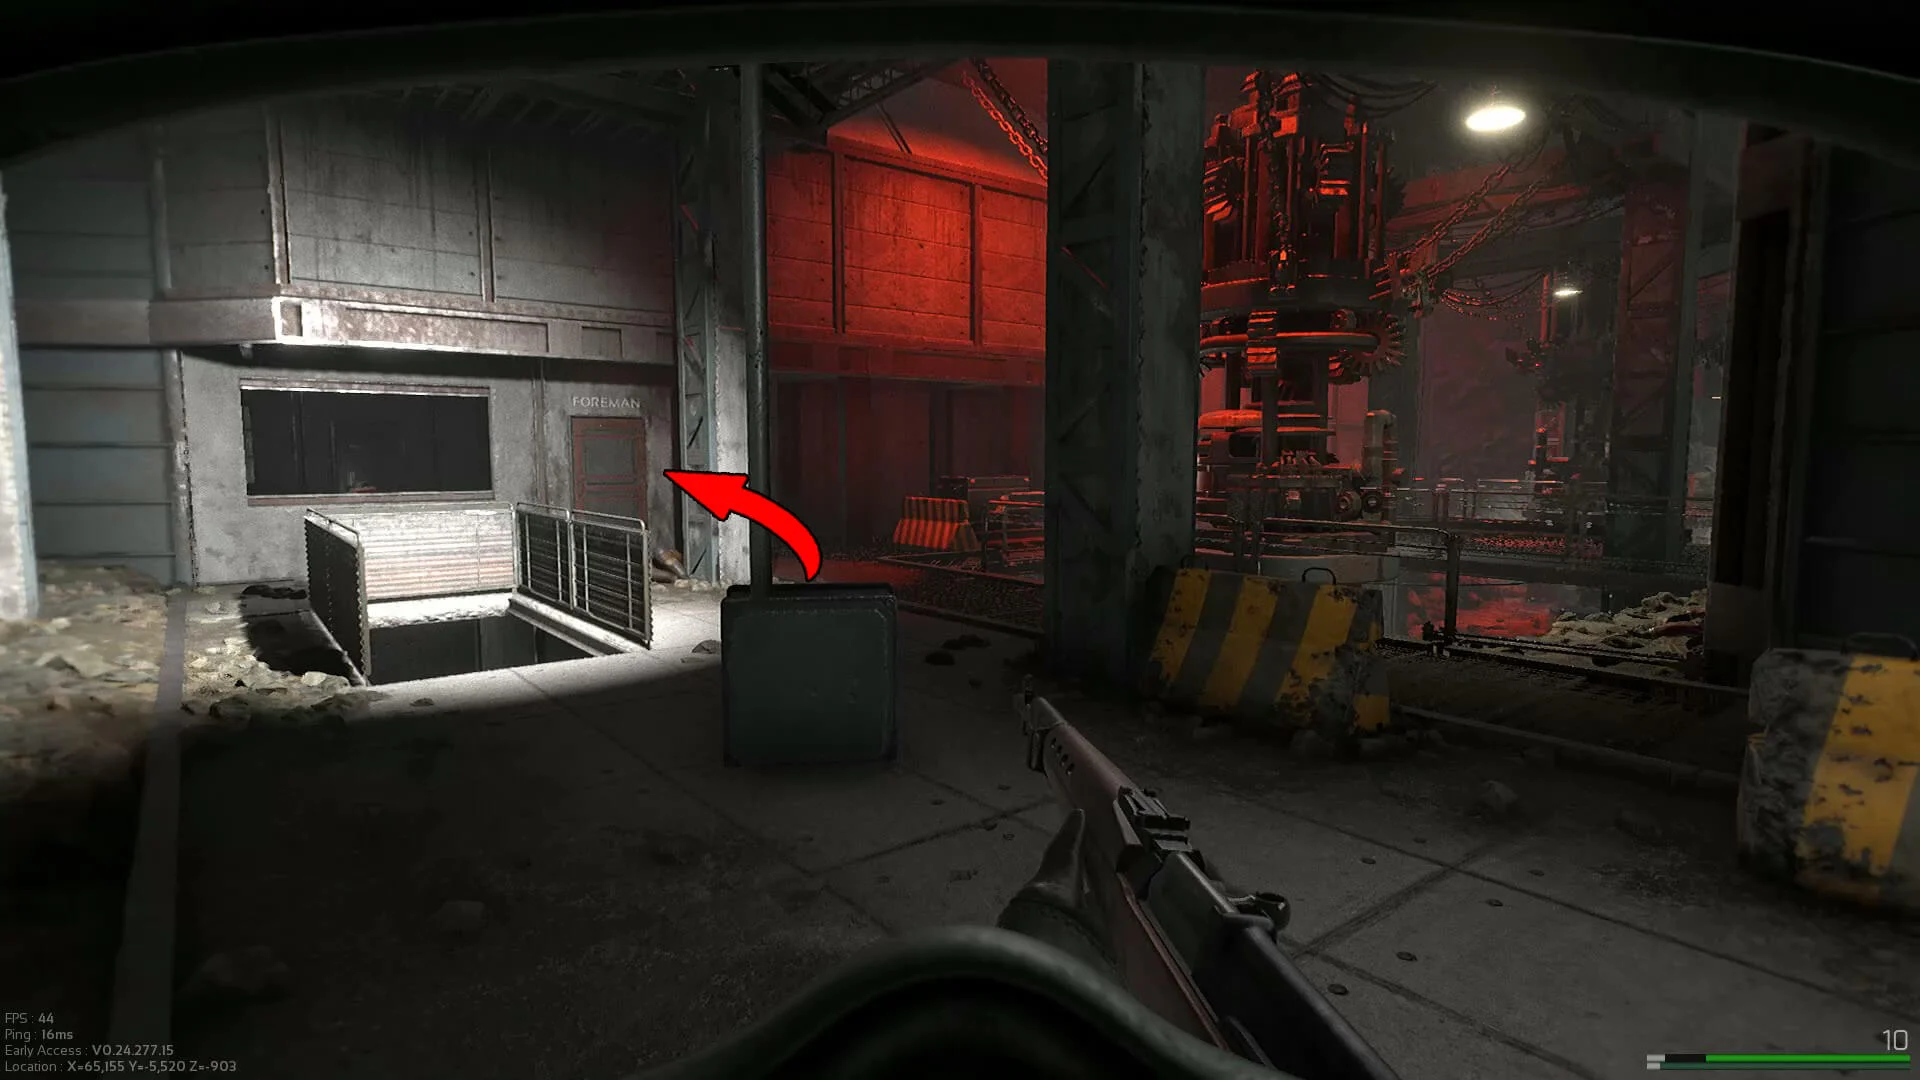
The Foreman’s Gold Ring can be found in the lower decks of the Iridium Asteroid Mine in the Foreman’s Office. To find the Gold Ring and the Foreman’s Office, take the ramp heading down near the Half Track Bike (Repo Man Core Contract) to enter the tunnel and cave system being excavated by machinery. The Foreman’s Office can be found here, near a bright red light on the wall above. To collect the Gold Ring, enter the Foreman’s Office and interact with the ring on the desk.
The Gold Ring to complete the Brigand Service Daily Contract in the Iridium Asteroid Mine can be found at the following coordinates:
- X = 67,000
- Y = -5,550
- Z = -910
Call Home
- Faction – United Allies
- Requirements – Collect 3 Transmitters from the Iridium Asteroid Mine or the L1812 Service Space Station and deliver them
- XP Reward – 415
- Faction Standing Reward – 35
- $ Reward – $13,500
- Other Rewards – 1 Thompson, 1 Thompson Drum Mag, .45 ACP
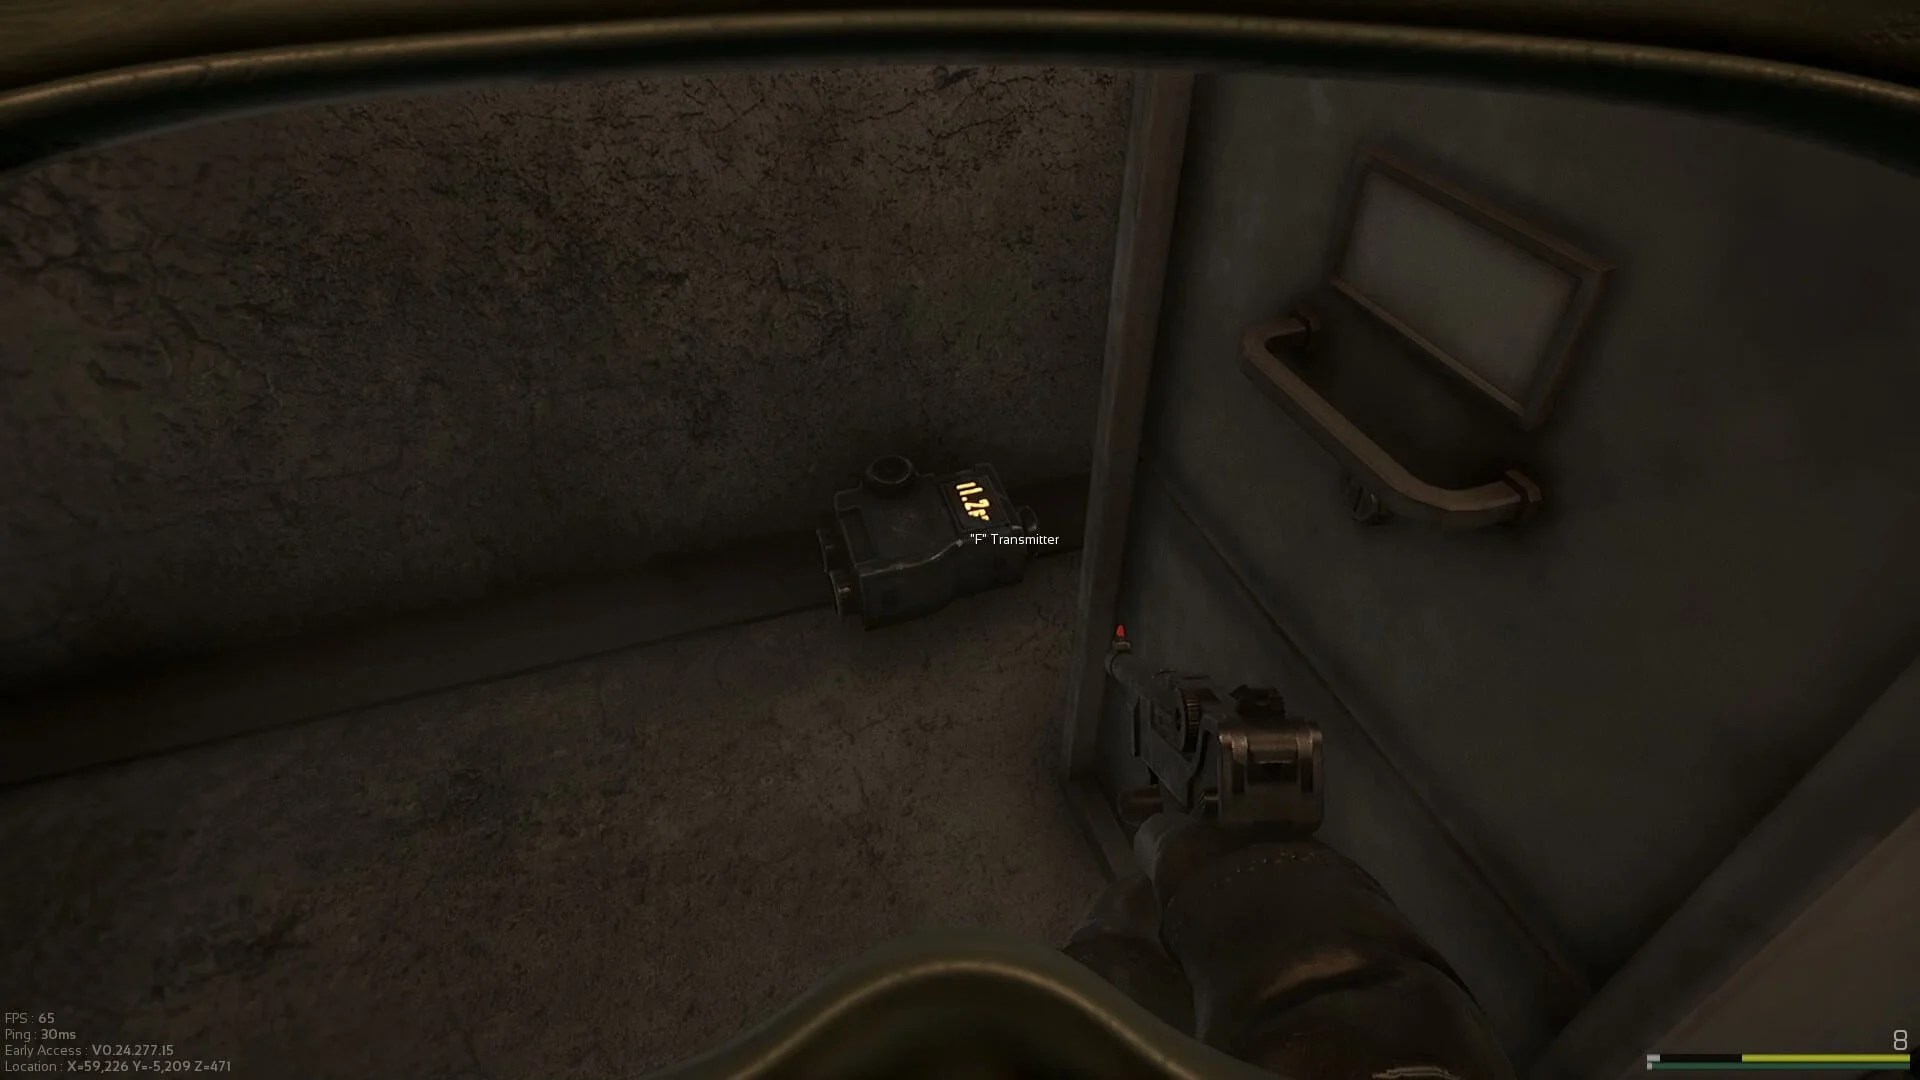
Transmitters are small boxes that are hidden away in inconspicuous places. Search these locations thoroughly to find them.
Iridium Asteroid Mine:
- One Transmitter spawns in the Foreman’s Office (same location as the Brigand Service Daily Contract) located on the lower decks, accessed via a ramp leading down near the Half Track Bike at the centre of the map. The Transmitter is on a small table near the door.
- Another Transmitter can spawn in the Security Office, accessed via a ramp leading up from the Half Track Bike near the centre of the map. The Transmitter is hidden on the floor between the front desk and a filing cabinet, near the front door to the Security Office and the locked gate to the armory.
L1812 Service Station/Spaceport:
- One Transmitter can be found in the Bar area, towards the centre of the map. Make your way here and around the circular room to find the Vault on the ground floor. Facing the Vault door, there will be a small room to your left. The Transmitter can be found on the front desk.
Clear Path
- Faction – Central Empire
- Requirements – Destroy 4 Space Mines
- XP Reward – 250
- Faction Standing Reward – 35
- $ Reward – $9,000
- Other Rewards – 1 Torpedo Launcher
This is one of the easier Marauders Contracts; Space Mines can be found floating around outside of many Raid Locations.
Here’s what they look like:

Get the Space Mines in your crosshairs and fire away. Keep your distance, though — after all, they do explode.
Coin Collector
- Faction – United Allies
- Requirements – Deliver 8 Copper Coins
- XP Reward – 225
- Faction Standing Reward – 20
- $ Reward – $10,000
- Other Rewards – N/A
Copper Coins are loot that you can find in most Raid Locations. Collect them in successive Raids and then turn the whole stack in one you have enough.
Crop Production
- Faction – Kingdom Alliance
- Requirements – Examine the Manifest in the Terraformer Production Building
- XP Reward – 250
- Faction Standing Reward – 50
- $ Reward – $7,500
- Other Rewards – 1 Thompson, .45 ACP
This Contract asks you to go interact with the Production Manifest in the Production Building on the Terraformer map. To find the Production Manifest, look for a large concrete building marked with distinctive red paint, labelled ‘Production’. Inside will be the Manifest, located on a table at the centre of the room.
The Production Manifest for the Crop Production Daily Contract can be found at the following coordinates:
- X = 52,500
- Y = -44,000
- Z = 250
Cull Cattle
- Faction – Kingdom Alliance
- Requirements – Kill 8 Raiders in the Spaceport, Iridium Asteroid Mine, or Terraformer map.
- XP Reward – 175
- Faction Standing Reward – 35
- $ Reward – $7,500
- Other Rewards – N/A
This Contract tasks you with killing eight Raiders in the Spaceport (L1812 Service Station, Iridium Asteroid Mine, or the Terraformer map. Raiders are the basic NPC opponents you will undoubtedly encounter during a Raid in any of these locations.
Fuel Shortage
- Faction – Central Empire
- Requirements – Deliver a Motor Oil Can found in the Iridium Asteroid Mine or Spaceport
- XP Reward – 250
- Faction Standing Reward – 35
- $ Reward – $11,000
- Other Rewards – SVT-40, 54-R. Ammo
The Fuel Shortage Contract asks you to collect and deliver a Motor Oil Can found in the Iridium Asteroid Mine or Spaceport (L1812 Service Station) map. These are small red cans located in the environment that you will have to pick up and store in your inventory until you extract from your current Raid alive.
Head Protection
- Faction – United Allies
- Requirements – Deliver 3 M1 Helmets
- XP Reward – 250
- Faction Standing Reward – 35
- $ Reward – $6,750
- Other Rewards – M5 Helmet
This is another one of the easier Marauders Contracts. Once you hit Level 15, you can Craft the M1 Helmets at the cost of 3 Metal Scrap and 1 Fabric each.
Light Recon
- Faction – Kingdom Alliance
- Requirements – Go to the bottom of the Iridium Asteroid Mine and interact with the dead Security Team
- XP Reward – 100
- Faction Standing Reward – 15
- $ Reward – $12,000
- Other Rewards – N/A
This Contract requires you to delve deep into the Iridium Asteroid Mine. Unfortunately, we don’t have a specific location just yet.
Merchant Piracy
- Faction – Kingdom Alliance
- Requirements – Go to the Merchant Ship and hold the Bridge for 0:45
- XP Reward – 175
- Faction Standing Reward – 20
- $ Reward – $7,500
- Other Rewards – BA Flak Vest
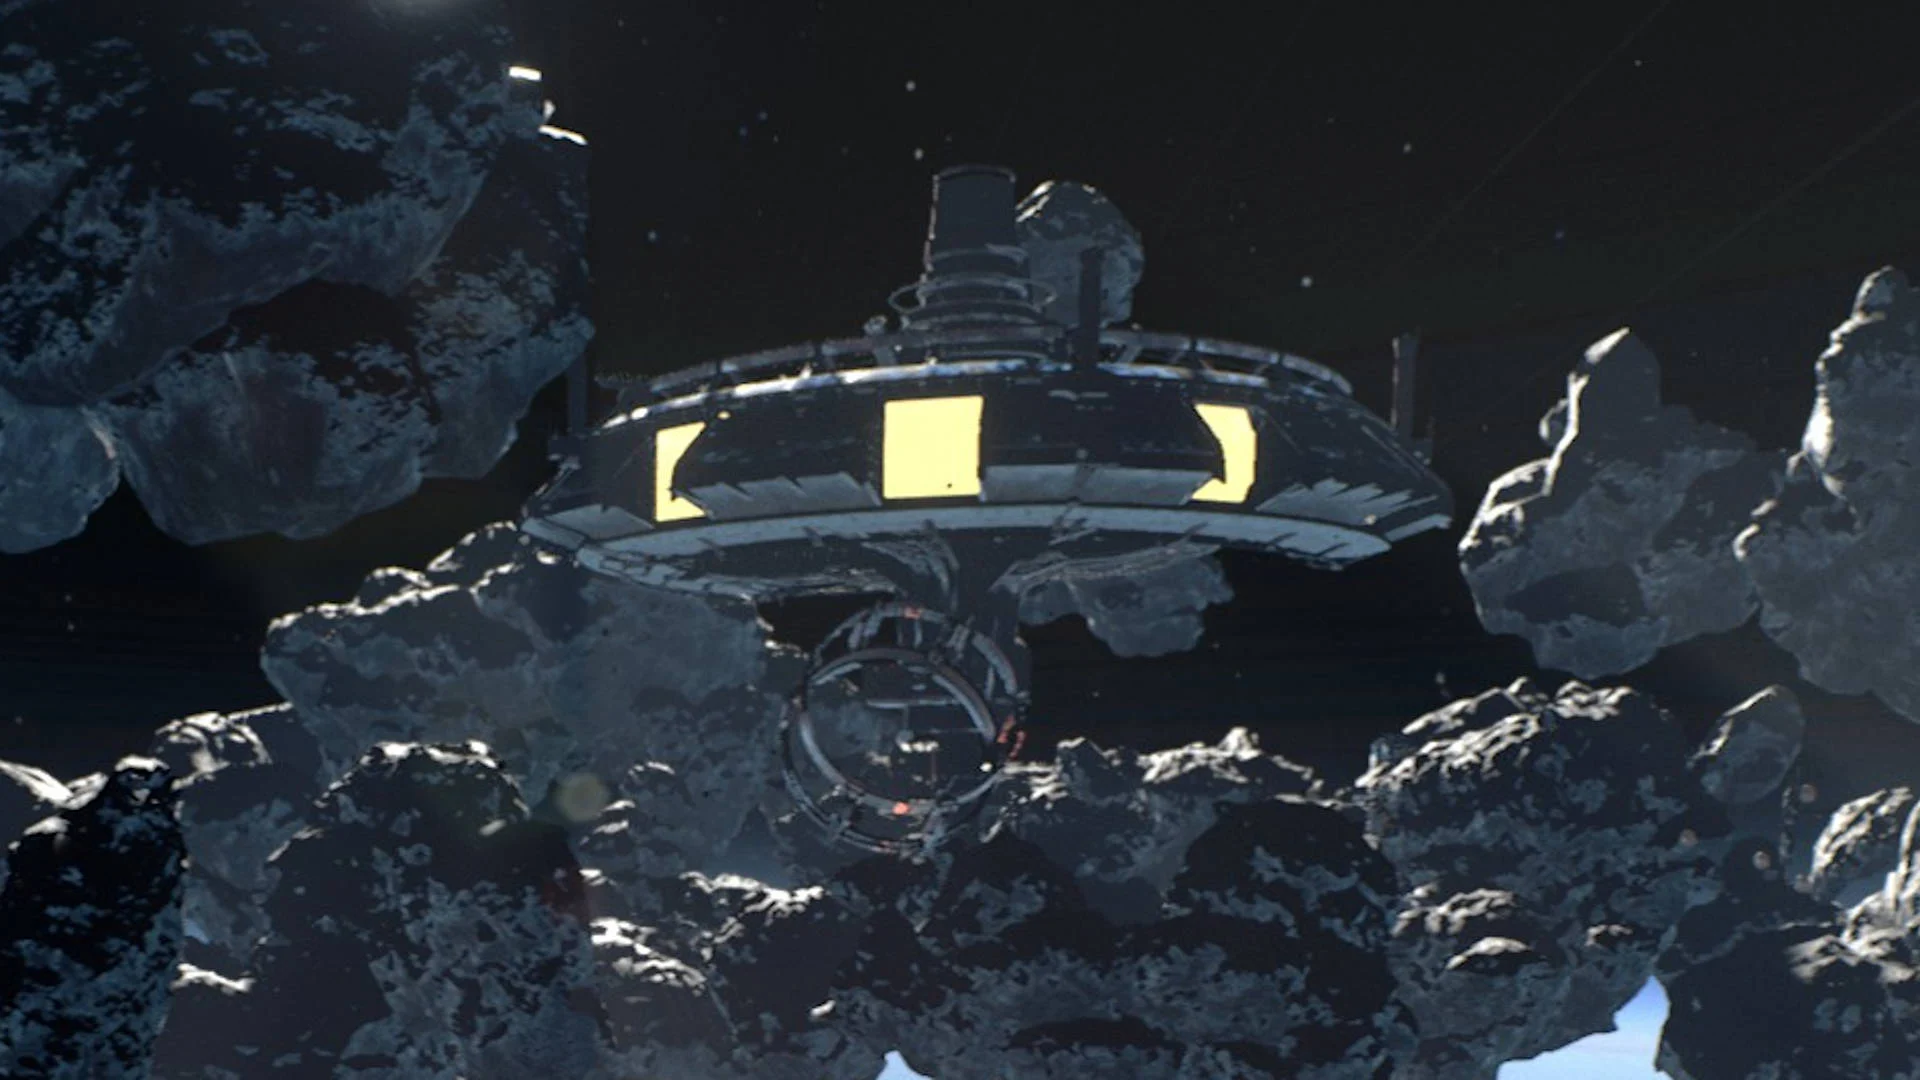
The Merchant Ship is a rare Raid Location that can spawn on other maps; you’ll have to board a Breaching Pod and ram into it to get in. The Bridge is at the top of the ship, so work your way up and carefully deal with any Security Personnel or players you encounter along the way.
Mineral Mania
- Faction – Central Empire
- Requirements – Deliver an Asteroid Nickel Ore sample (found in the Iridium Asteroid Mine)
- XP Reward – 255
- Faction Standing Reward – 35
- $ Reward – $9,500
- Other Rewards – STG-44, 7.62 Ammo
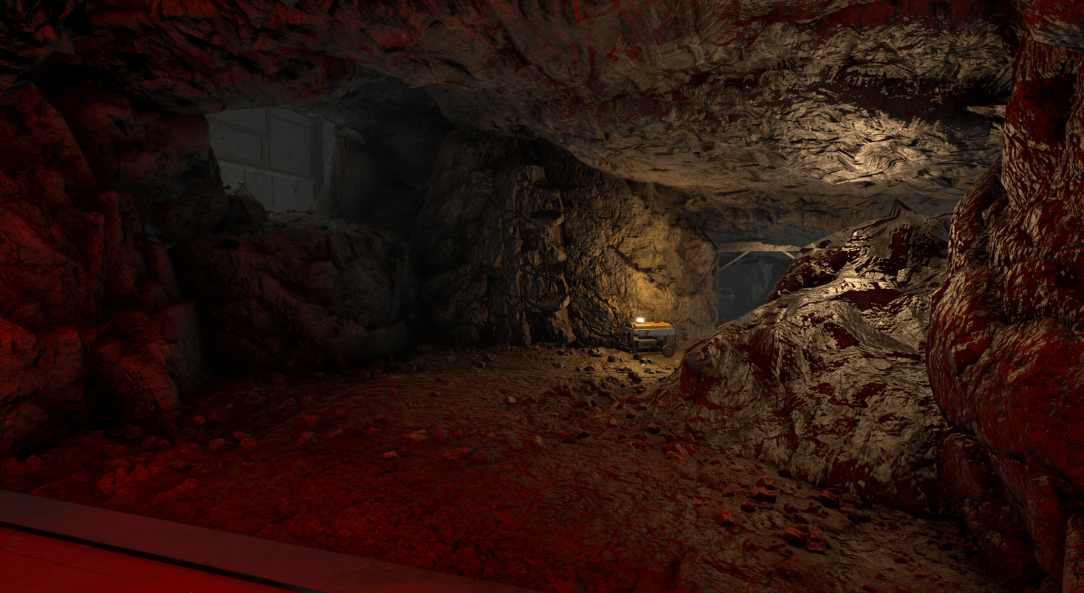
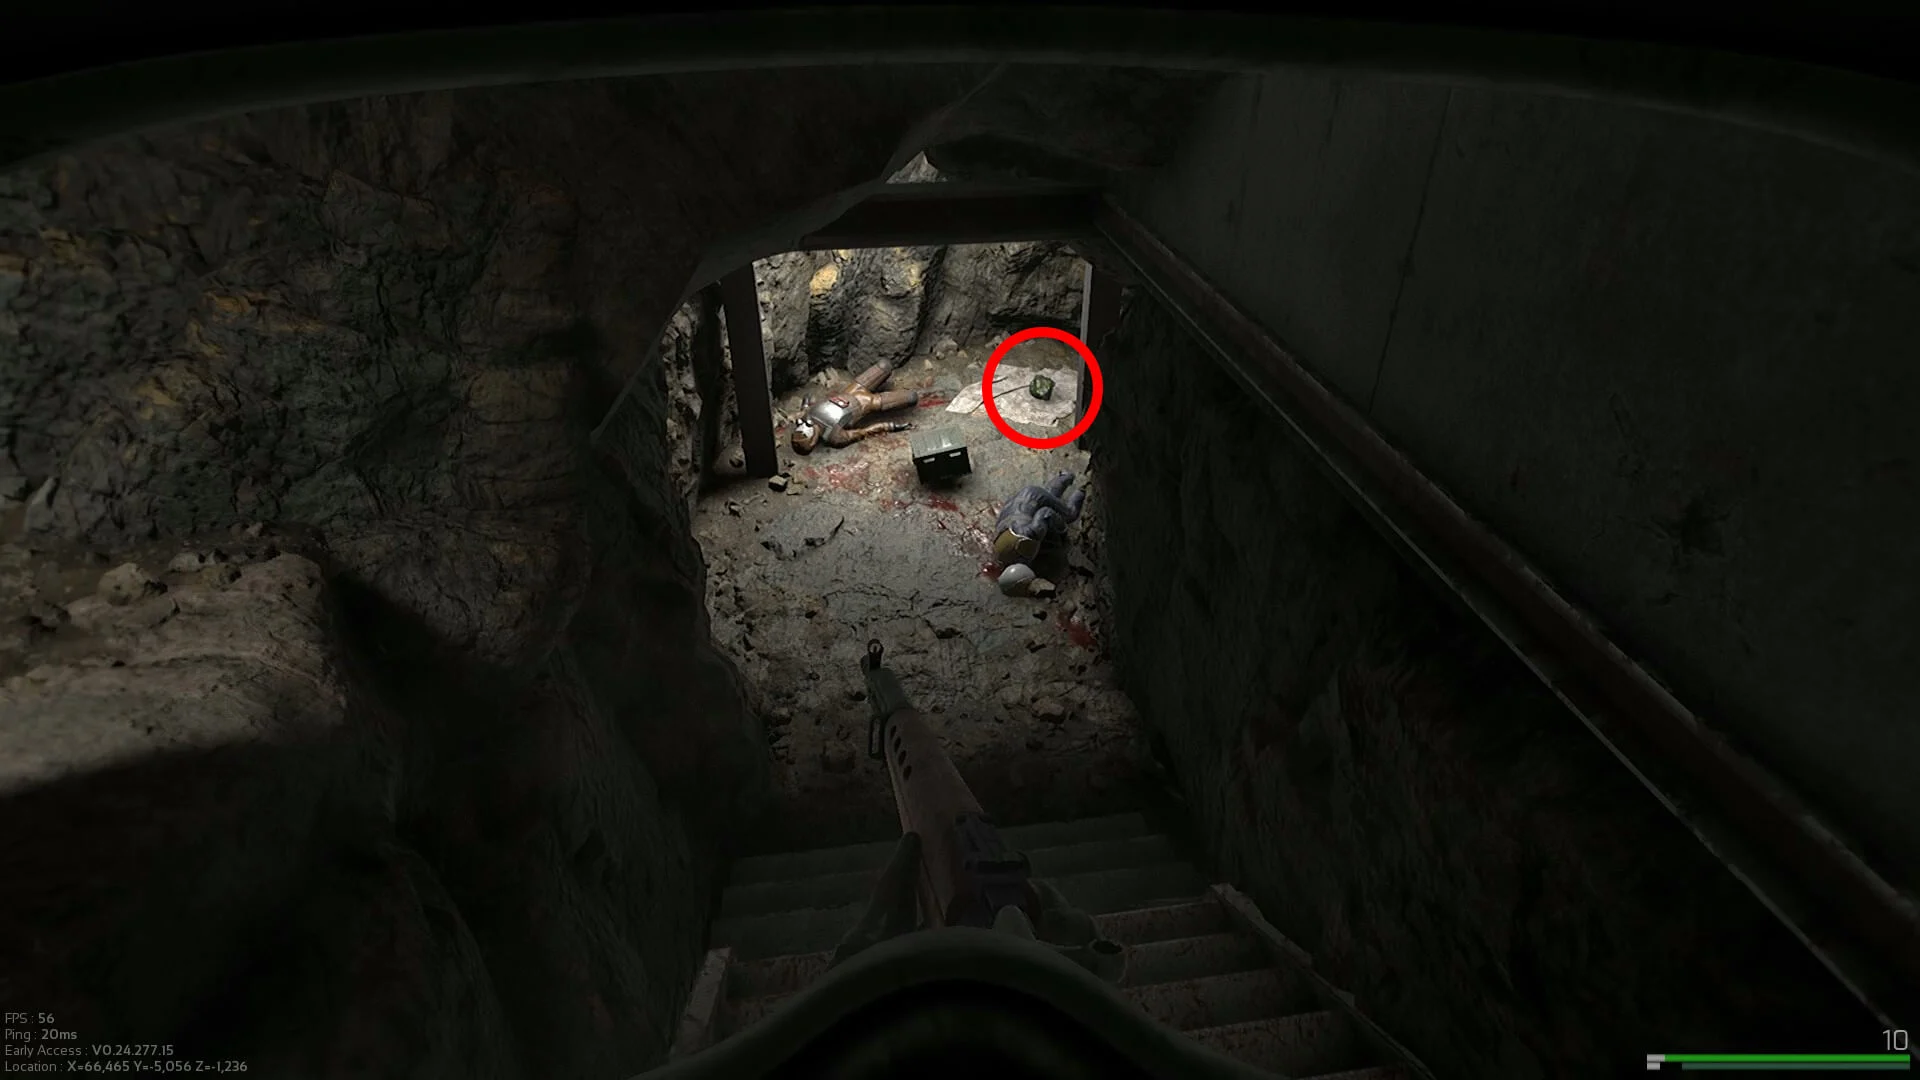
The Mineral Mania Daily Contract tasks the player with collecting and delivering an Asteroid Nickel Ore sample, found in the Iridium Asteroid Mine. To find the Asteroid Nickel Ore sample, take the ramp leading down from the Half Track Bike found at the centre of the map, near the Security Office and Export area. Follow the path until you reach the Foreman’s Office. Head through the Office, taking the door at the back revealing a small metal staircase leading to a lower tunnel. There will be minecart tracks and a dead body at the foot of the stairs. Follow the tracks to the right to find another short staircase leading to a small dead-end tunnel. Here you will find two bodies and the Asteroid Nickel Ore sample on a white sheet.
The Asteroid Nickel Ore sample to complete the Mineral Mania Daily Contract in the Iridium Asteroid Mine can be found at the following coordinates:
- X = 65,700
- Y = -5,120
- Z = -1,494
Papers Please
- Faction – United Allies
- Requirements – Read the Manifest located in the spaceport Admin Office (found in the L1812 Service Space Station)
- XP Reward – 200
- Faction Standing Reward – 35
- $ Reward – $7,000
- Other Rewards – M1941 Johnson, .300 Magnum Ammo
The Admin Manifest can be found on the desk in the Admin Office, located on the upper level of the Bar area at the centre of the spaceport. On the upper floor of this circular room, find the door labelled ‘Admin’ and head inside. The Manifest is the red stack of documents on the desk immediately to your right as you enter.
The Admin Manifest to complete the Papers Please Daily Contract in the L1812 Service Space Station can be found at the following coordinates:
- X = 57,800
- Y = 21,300
- Z = 800
Payday
- Faction – Kingdom Alliance
- Requirements – Examine the List of Bank Transfers at the L1812 Service Space Station
- XP Reward – 250
- Faction Standing Reward – 55
- $ Reward – $9,000
- Other Rewards – N/A
The List of Bank Transfers is somewhere in the L1812 Service Space Station, but we don’t have an exact location just yet.
Pirate King
- Faction – Central Empire
- Requirements – Kill 1 other Marauder (player)
- XP Reward – 350
- Faction Standing Reward – 35
- $ Reward – $5,500
- Other Rewards – N/A
You’ll inevitably complete this Contract simply by going on multiple Raids — all you have to do is kill another player.
Pistol Training
- Faction – Central Empire
- Requirements – Kill 12 enemies with the Mauser M712 Pistol
- XP Reward – 300
- Faction Standing Reward – 25
- $ Reward – $8,000
- Other Rewards – 1 STG-44, 7.62 Ammo
The Pistol Training Contract tasks you with eliminating enemies using the Mauser M712 Pistol. This weapon can be looted during Raids or purchased from certain Merchants.
Currently, this Contract can be completed using any weapon, so long as you have the Mauser M712 Pistol equipped in your sidearm weapon slot. Whether this is working as intended or not remains to be seen.
Security Detail
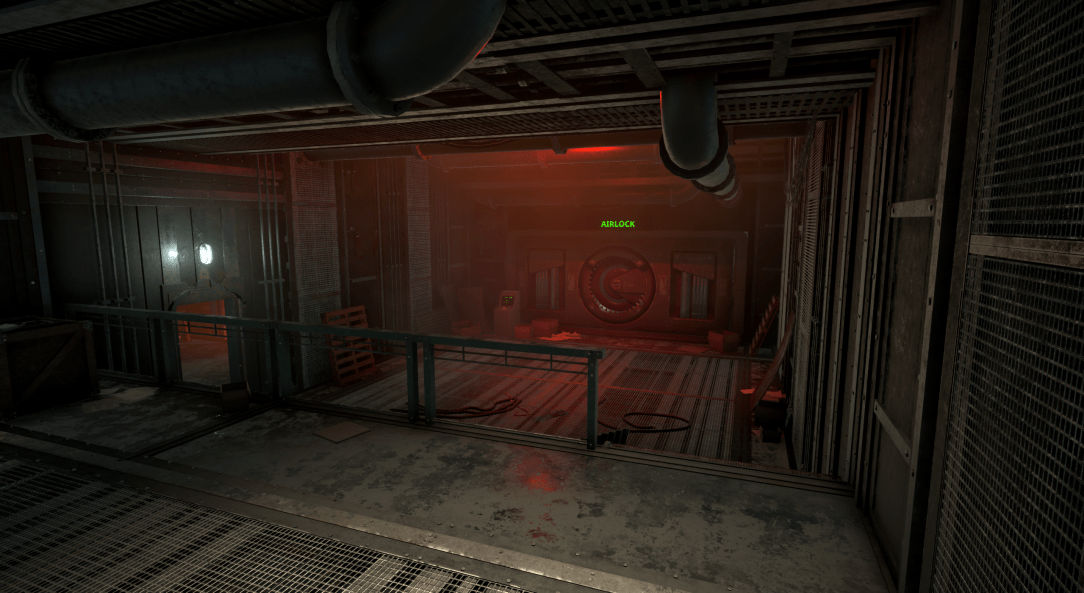
- Faction – United Allies
- Requirements – Hold the Security Office in the Iridium Asteroid Mine for 1:00 (requires Lockpick)
- XP Reward – 425
- Faction Standing Reward – 35
- $ Reward – $12,000
- Other Rewards – U.A. Supply Drop
This is one of the slightly trickier Marauders Contracts — you’re going to need to loot or Craft a Lockpick and bring it with you. You can’t get into the Security Office without one. Once you do, interact with the prompt and wait for 1 minute to complete this Contract.

- Faction – Central Empire
- Requirements – Examine the Cargo Report at the L1812 Service Space Station
- XP Reward – 250
- Faction Standing Reward – 55
- $ Reward – $9,000
- Other Rewards – N/A
The Spaceport Cargo Report to complete the Shopping Tour Contract, is located in the L1812 Service Space Station at the following coordinates:
- X = 66,570
- Y = 19,003
- Z = 397
Sidearm Inventory
- Faction – United Allies
- Requirements – Return 3 1911 Pistols
- XP Reward – 525
- Faction Standing Reward – 35
- $ Reward – $18,000
- Other Rewards – 1 Trench Gun
The Sidearm Inventory Contract asks that you deliver three 1911 Pistols. These are sidearms that can be looted from containers or enemies during Raids. Once you have three of these pistols in your inventory, turn them in to complete the Contract and receive your rewards.
Silent Assassin
- Faction – Kingdom Alliance
- Requirements – Kill 6 NPCs or Marauders (players) with the Welrod
- XP Reward – 300
- Faction Standing Reward – 25
- $ Reward – $8,000
- Other Rewards – 1 Bren Mk2, 7.62 Ammo
It’s always a good idea to hold onto a couple of Welrods just in case this Contract comes up. You’ll have to kill 6 NPCs and/or Marauders in order to complete it. The Welrod is a bolt-action suppressed pistol, so it’s best to only use it when you can carefully line up a headshot — that is to say, your best chance is to sneak up on enemies rather than attempting to use this gun during a firefight.
Vault Intel
- Faction – Central Empire
- Requirements – Reach the Spaceport Vault to confirm intel
- XP Reward – 250
- Faction Standing Reward – 25
- $ Reward – $9,000
- Other Rewards – 1 MP40
The Vault Intel Contract asks you to make your way to the Vault on the Spaceport/L1812 Service Station map and to guard the area for a short time. Note that you do not need to open the Vault, meaning no Blowtorch is required.
War Economy
- Faction – United Allies
- Requirements – Deliver 3 Metal Sheets
- XP Reward – 325
- Faction Standing Reward – 35
- $ Reward – $18,000
- Other Rewards – 1 M50 Reising, .45 ACP
Metal Sheets can be found in most Raid Locations, and you might even have a few on hand by the time you get this Contract. Collect 3 of them and deliver them as requested.
War Effort
- Faction – Kingdom Alliance
- Requirements – Kill 1 Navy Commando
- XP Reward – 175
- Faction Standing Reward – 35
- $ Reward – $7,500
- Other Rewards – K.A. Supply Drop
The War Effort Contract sets you the goal of eliminating a Navy Commando. These are elite NPCs found only in the most dangerous of locations, such as the Damaged Capital Ship. Proceed with cautious as these are among the toughest foes in the Marauders, often coming equipped with full Panzer Rig armour and assault rifles.
More Daily Contracts and more details on the above Contracts to be added as we progress in the game.
via Robert N. Adams